

Transforming raw green beans into rich, flavorful coffee is one of the most rewarding skills a coffee enthusiast can develop. The roasting process shapes everything you taste in your cup, from the brightness of a light roast to the smoky depth of a dark one. Most people assume great coffee starts at the brew stage, but the real magic happens earlier, inside the roaster drum. This guide walks you through every phase of the coffee roasting process, from choosing your equipment to evaluating your final results, with practical pro tips built for enthusiasts who want artisan-level quality.
Table of Contents
- What you need to start roasting coffee
- Step-by-step coffee roasting process: Timing, temperature, and phases
- How to troubleshoot and prevent common roasting defects
- Evaluating your results: Measuring quality and optimizing profiles
- A fresh perspective: Why artisan roasting is more than technique
- Discover artisan roasted blends from LastChapter Coffee
- Frequently asked questions
Key Takeaways
| Point | Details |
|---|---|
| Roaster choice matters | Drum and air roasters yield distinct flavors, body, and consistency in every batch. |
| Timing shapes quality | Precise control of temperature and roast duration is critical for artisan results. |
| Defect prevention crucial | Monitoring variables like charge temp and batch density minimizes roasting mistakes. |
| Profile tracking essential | Successful roasters use benchmarks and sensory cues to optimize every batch. |
| Experience brings mastery | Artisan roasting combines technical know-how with intuition and bean knowledge for the best coffee. |
What you need to start roasting coffee
Now that you’re ready to dive in, let’s review what you’ll need to roast coffee effectively and safely. Getting the right setup from the start prevents frustration and protects your green beans from wasted potential.
Here’s what every home roaster needs before their first batch:
- Green coffee beans: Unroasted beans are your raw material. Origin, density, and moisture content all influence how they respond to heat.
- A drum or air roaster: Your most important piece of equipment. Each type produces distinctly different results.
- A kitchen scale: Consistency starts with precise measurements. Weigh your green beans before and after every roast.
- A timer: Roasting phases are time-sensitive. Even 30 seconds can shift a profile from medium to dark.
- A cooling tray or colander: Stopping the roast quickly is critical. Beans continue cooking from residual heat if you don’t cool them fast.
- Airtight storage containers: Freshly roasted beans off-gas CO2 for up to 72 hours. Use containers with one-way valves.
The biggest decision you’ll make is choosing between a drum roaster and an air roaster. Drum vs. air roasters differ significantly: drum roasters use complex heat transfer and produce fuller-bodied profiles, while air roasters apply uniform convection and yield clean, bright coffees.
| Feature | Drum roaster | Air roaster |
|---|---|---|
| Heat method | Conduction + convection | Convection only |
| Flavor profile | Full body, caramel, chocolate | Bright, clean, origin-forward |
| Batch size | Larger (up to 1 lb+) | Smaller (2-8 oz typical) |
| Learning curve | Steeper | More beginner-friendly |
| Price range | $300 to $3,000+ | $50 to $500 |
| Best for | Dark and medium roasts | Light and medium roasts |
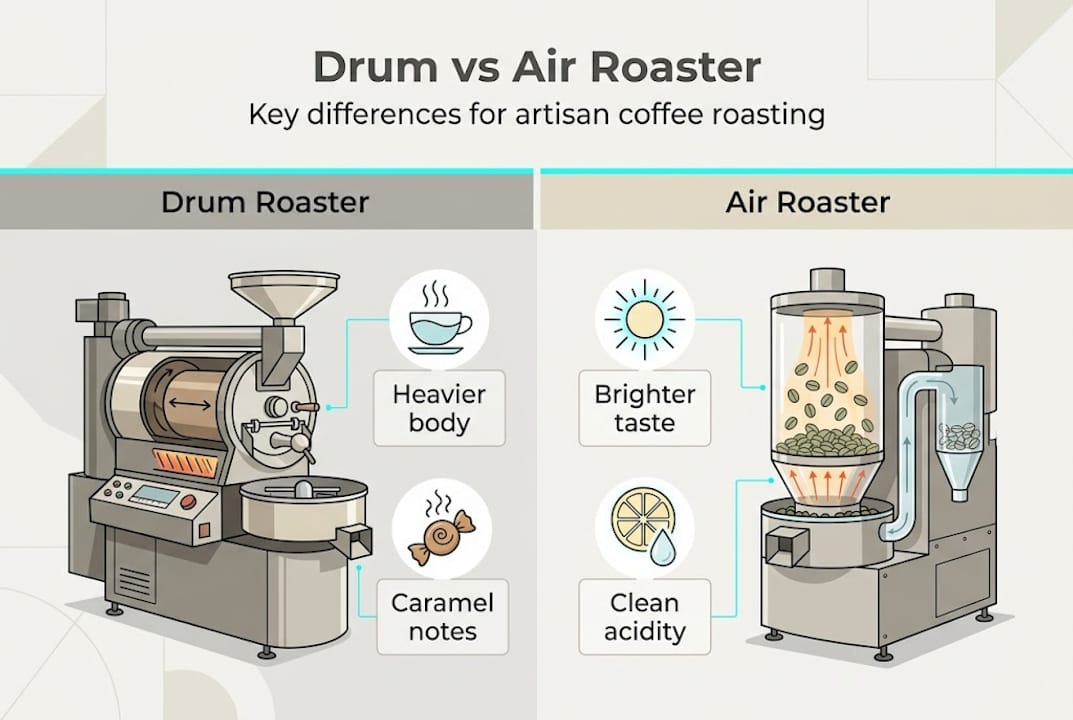
If you love bold, heavy cups like a French roast blend, a drum roaster will serve you well. For nuanced, lighter profiles similar to a mushroom medium roast, an air roaster’s precision is hard to beat. You can learn more on roaster types before committing to one.
Pro Tip: Start with a single-origin bean from a consistent source for your first few roasts. Blending comes later. Consistency in your green bean makes it far easier to isolate roasting variables.
Always treat your roaster with respect. Temperatures exceed 400°F, and moving parts inside drum roasters create pinch hazards. Never leave a roast unattended.
Step-by-step coffee roasting process: Timing, temperature, and phases
With your equipment and beans ready, let’s walk through each step of roasting, from initial charge to final development. Understanding each phase gives you control over flavor outcomes instead of leaving them to chance.
- Charge: Load your green beans into the preheated roaster. Charge temperature typically ranges from 350°F to 430°F depending on bean density. Denser beans need higher charge temps to absorb heat efficiently.
- Drying phase (0 to 5 minutes): Beans lose moisture rapidly. They turn from green to yellow and produce a grassy, hay-like aroma. No browning yet.
- Maillard reaction (5 to 8 minutes): Sugars and amino acids interact, producing hundreds of flavor compounds. Beans shift from yellow to tan to light brown. This is where sweetness and complexity develop.
- First crack (around 8 to 10 minutes): Beans audibly pop as internal pressure releases steam and CO2. This marks the beginning of light roast territory.
- Development phase (post-first crack): This is where you make your call. Light roasts stop here, medium roasts continue 1 to 2 minutes further, and dark roasts push toward or past second crack.
- Cooling: Drop beans immediately into your cooling tray and stir continuously for 3 to 5 minutes until they reach room temperature.
Timing and temperature benchmarks matter enormously. According to roast variables research, development ratios, Rate of Rise benchmarks, and shrinkage percentages vary predictably across roast levels:
| Roast level | Total time | Dev ratio | Shrinkage |
|---|---|---|---|
| Light | ~10 min | ~12% | 12 to 15% |
| Medium | ~12 min | ~18% | 15 to 18% |
| Dark | ~15 min | ~22% | 18 to 24% |
A practical note on yield: every 100 lbs of green beans produces roughly 78 to 88 lbs roasted, depending on roast level. Check this shrinkage guide if you’re scaling up production.
Rate of Rise (RoR) is the speed at which bean temperature climbs per minute. Slow RoR works best for dense, high-altitude beans. Faster RoR suits lower-density beans that need quicker energy input. For bold profiles like dark roast coffee or a mushroom dark roast, a controlled RoR prevents scorching while still achieving full development. If you prefer convenience over home roasting, instant coffee options offer expertly roasted results without the equipment.
How to troubleshoot and prevent common roasting defects
As you roast, you may encounter defects that affect flavor and quality. Here’s how to spot and fix them before they ruin a batch.
The most common defects and their causes include:
- Scorching: Dark patches on bean surfaces caused by too-high charge temperature or insufficient drum rotation. Tastes harsh and acrid.
- Tipping: Burned bean tips from excessive heat during the drying phase. Common with low-density beans at high charge temps.
- Baking: Flat, papery, lifeless flavor caused by stalled RoR or too-low heat during development. The roast loses momentum and “bakes” rather than develops.
- Underdevelopment: Sour, grassy, or astringent taste from stopping the roast too early. Development ratio is too low.
- Overdevelopment: Bitter, ashy, or hollow flavor from pushing past the ideal development window.
Roasting defects like scorching, tipping, and baking each have distinct visual and sensory signatures that guide your diagnosis.
“Light roasts are the most honest expression of a green bean. Every defect in the raw material shows up clearly in the cup. That’s why specialty roasters use light profiles to evaluate new green bean lots before committing to a full roast program.”
Prevention is always easier than correction. Monitor your charge temperature carefully before loading beans. Match batch size to your roaster’s rated capacity. Never exceed 80% of maximum capacity, as overfilling restricts airflow and causes uneven development. Sample roasting small test batches of new green bean lots before committing to full production runs.
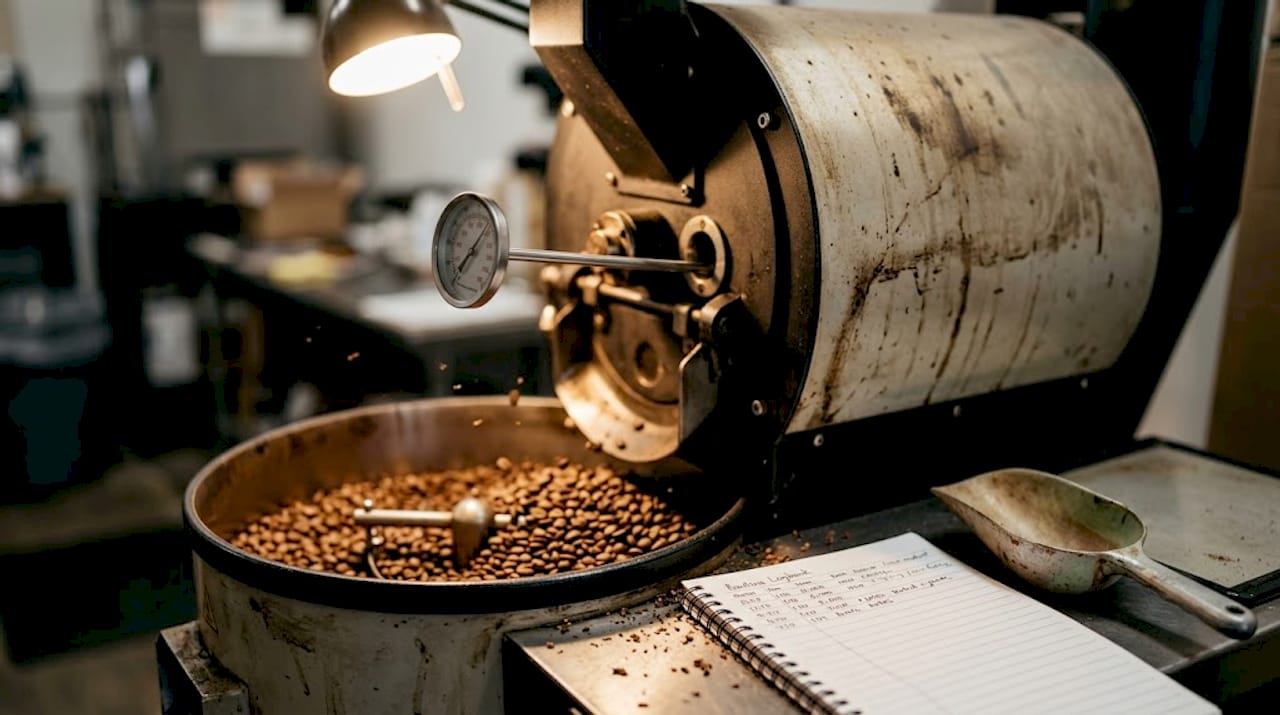
Pro Tip: Keep a roast log for every batch. Record charge temp, RoR at key intervals, first crack time, and drop time. After tasting, note the defects you detect. Over time, patterns emerge that tell you exactly where your process needs adjustment.
For a reference point on what defect-free roasting tastes like, explore roast defect-free blends or the clean, vibrant African espresso profile to calibrate your sensory expectations.
Evaluating your results: Measuring quality and optimizing profiles
Once your beans are roasted, it’s time to evaluate the results and refine your approach for the next batch. Evaluation is not optional. It’s the feedback loop that separates improving roasters from those who repeat the same mistakes.
Start with sensory evaluation immediately after cooling:
- Aroma: Fresh roasted beans should smell sweet, complex, and clean. Off-notes like smoke, grass, or sourness signal defects.
- Color: Compare your beans to a color reference chart. Inconsistent coloring across a batch indicates uneven heat distribution.
- Surface texture: Light roasts are dry and matte. Medium roasts show slight sheen. Dark roasts are visibly oily. Unexpected oiliness on a medium roast suggests overdevelopment.
- Flavor: Brew a simple pour-over or French press 24 hours after roasting. Taste for sweetness, acidity, body, and finish.
Artisan roasting emphasizes profile tracking, repeatable benchmarks, and sensory-guided adjustments as the foundation of quality improvement.
Profile tracking means recording your RoR curve, development ratio, and total roast time for every batch. When a batch tastes exceptional, your log tells you exactly how to repeat it. When something goes wrong, the log tells you where the process diverged.
| Brew method | Optimize for | Key adjustment |
|---|---|---|
| Espresso | Body, sweetness, low acidity | Extend Maillard phase, medium-dark roast |
| Filter/pour-over | Clarity, brightness, origin notes | Shorter development, light to medium roast |
| Cold brew | Smooth, chocolatey, low bitterness | Medium to dark, higher charge temp |
For espresso, extending the Maillard phase by 30 to 60 seconds builds sweetness and reduces sharp acidity. For filter brewing, a shorter development preserves the bright, origin-specific notes that make specialty coffee worth drinking. Check out French roast sensory results or a cold brew evaluation to see how roast level shapes the final cup experience. For deeper technical comparisons, drum vs. air reviews offer useful benchmarks for equipment-driven profile differences.
A fresh perspective: Why artisan roasting is more than technique
Having mastered the steps and common pitfalls, let’s reflect on what sets the artisan approach apart in coffee roasting. Most guides focus on the mechanics, and that’s necessary. But technique alone doesn’t make artisan coffee.
The roasters who produce truly memorable cups treat their data as a starting point, not a destination. A perfect RoR curve on paper can still produce a mediocre batch if the roaster ignores what their nose and palate are telling them. Sensory intuition, built through hundreds of batches, is what bridges the gap between technically correct and genuinely great.
Defects are also underrated teachers. A scorched batch doesn’t just mean you need to lower your charge temperature. It reveals something about your bean’s density, your roaster’s heat retention, and even the ambient temperature in your roasting space. Treat every flaw as a data point, not a failure.
Finally, the green bean itself deserves more respect than most home roasters give it. Origin, processing method, and altitude all shape what’s possible in the roast. Exploring artisan roasting insights through thoughtfully sourced beans shows how much flavor potential lives in the raw material before the roaster ever touches it.
Discover artisan roasted blends from LastChapter Coffee
If you’re eager to taste the results of expert roasting, Last Chapter Coffee offers blends designed for every palate. Whether you’re still dialing in your home setup or simply want a benchmark to roast toward, tasting professionally roasted coffee is one of the fastest ways to sharpen your own sensory skills.
From the high-caffeine precision of the Max Caf Blend to the vibrant, origin-forward character of the African Kahawa Blend, every product reflects the same roasting principles covered in this guide. Free US shipping on all orders means your next tasting benchmark is just a click away. Shop artisan coffee and experience what expert profile development tastes like in the cup.
Frequently asked questions
What is Rate of Rise (RoR) in coffee roasting?
RoR monitors how quickly bean temperature increases per minute during roasting, helping you control development momentum and prevent defects like baking or scorching. Keeping RoR smooth and declining through the development phase is the hallmark of a well-controlled roast.
How much weight does coffee lose during roasting?
Coffee beans lose 12 to 24% of their green weight during roasting, with lighter roasts losing less moisture and darker roasts losing significantly more as sugars and CO2 are driven off.
How can I spot and fix roasting defects?
Look for burnt patches indicating scorching, a sour or grassy taste pointing to underdevelopment, or a flat dull flavor signaling baking. Adjusting heat, airflow, and batch size addresses most defects at their root cause.
Does roast type affect flavor and aroma?
Absolutely. Drum roasting produces fuller body with caramel and chocolate notes, while air roasting delivers cleaner acidity and more transparent origin character in the cup.
Why do artisan roasters prefer light roasting for premium beans?
Light roasting preserves the complex, origin-specific flavors locked in high-quality green beans. Because light roasts reveal every flaw in the raw material, specialty roasters use them to honestly evaluate green bean quality before committing to a full production roast.


